
When we’re planning for a remodeling job, one of the top checklist items is jobsite protection. The first rule is to do no harm. We don’t want to damage any existing finishes or contaminate the homeowner’s living space. So we plan in advance to control dust and protect surface finishes.
There are four main steps to dust control on the job:
Dust Barriers
There are three standard ways to build dust walls: For long-term or high-strength walls, constructed wood frames covered with plastic or sheet goods are the most durable. We seal the perimeter with tape or sill sealer foam. For short-term use, pole-type systems (such as ZipWall) are easy and inexpensive. And simply taping plastic to ceiling and walls can work for the short term, if there is no wind load.
When possible, set up dust enclosures where they won’t need to be moved for the duration of the project, including painting and floor finishing.
Here’s a tip: Install furnace filters in the dust wall to allow wind to blow in and out without carrying too much dust through. This helps keep wind pressure or door slams from blowing the wall down.
Once the dust wall is in place, you need a way in or out of the work space. One solution is to use an actual hinged door (such as an interior door being demoed from the project area, a sheet of plywood on hinges, or a $50 home-center screen door with plastic stapled to it).
Another common method to provide access is to install a double-zipper door with self-sticking zippers (some brands come with metal hooks to hold the flap of plastic out of the way when the door is opened). And finally, overlapped plastic sheeting works well: Cut a vertical slit in the dust-wall plastic, then tape a 3- to 4-foot-wide piece to cover the hole. This method is inexpensive and convenient, and, with negative air pressure, will keep dust in the work area. (It’s even endorsed by the EPA Lead Renovation, Repair and Painting training.)
Negative Air Pressure
Once the dust walls are set up, we need to create negative air pressure in the work area. The basic idea is to blow air out of the work area so the work area is under lower pressure than the rest of the house. All dust walls have small holes. If the work area is negative and the house is positive, air has to move from the house into the work area through those small holes. Dust can’t move into the house if all the air is moving out of the house.
It’s easy to tell if the work area is under negative pressure: The plastic will be sucking into the work space. If the plastic is blowing outward, the wind is stronger than the exhaust fan, and dust will escape. To fix this, either seal more holes or use a more powerful fan.
Fan Choices
For less than $25, a box or window fan works for a small area (one or maybe two rooms). It won’t work for a larger space, like an entire condo—it’s not strong enough. Use cardboard, foam board, or plywood to fill in around the fan in the window. A furnace filter can help keep the fan clean and running well.
A restoration “carpet dryer” fan, priced at around $200, can be installed with ductwork on the inlet or the outlet side. These units are available for rent. Use a filter to protect the motor from dust.
A woodworking dust extractor (priced under $200) can be placed outdoors with a 4-inch flexible drain pipe used as a duct into the interior room work space.
There are many situations (such as homes on small lots, townhouses, and condos) where blowing dust out of the window is a bad idea. For those cases, I suggest using an air filtration device (also called a negative air machine or a powered air scrubber). These cost $500 to $1,500 and are available for rent. They’re designed to move large amounts of air while filtering it; most units are equipped with HEPA filters.
HVAC Dust Protection
Keeping dust out of heating and cooling system ductwork is a top priority. To that end, I advise keeping the system fan turned off as much as possible, consistent with owner comfort—and definitely keeping it off during the dustiest operations. Block off all supply and return ducts in work areas.
Use filters on returns to reduce dust entry. Middle-level pleated-media filters are the best choice; the finest filters clog too quickly, and the cheapest don’t catch much. But any filter is better than none and will do in a pinch. Filters don’t need to fit the duct opening exactly; tape the filter to the wall over the entire return grille. Consider using an inexpensive pre-filter material in addition so the expensive filter will last longer.
Vacuum or clean the outside of the filter daily to extend its life. Be sure to turn the system fan off before vacuuming! Check the main system filter regularly and clean or change it as needed. Vacuum all accessible ducts after demolition is complete and at the end of the job. Consider a duct cleaning service. After work is complete, verify that the central air conditioner coil area is clean; dust on coils and heat exchangers causes inefficiencies, clogged condensate lines, and unhealthy biological growth.
Reducing Dust
Of course, if you can reduce the amount of dust you create, you reduce your need to exhaust it or filter it. Using a small amount of water during demo can drastically reduce dust. For smaller jobs, a hand-held spray bottle works fine. For larger jobs, pump-up garden sprayers may make sense. For exterior work, a hose with a good spray nozzle is ideal.
Lightly mist the work area before starting demolition. This alone traps huge amounts of dust. Misting as you go along also helps. For example, if you pop off a piece of window trim, spray a few pumps into the dusty area behind the jamb. Lightly misting before sweeping also knocks down tons of dust.
Be careful, though, about slip hazards when wetting floors. Masonite floor protection isn’t too slippery when wet, but plastic is.
Protecting Surfaces
The homes we work in commonly have valuable and vulnerable surfaces such as hardwood, carpet, and tile. Here are some tips on protecting those surfaces while you work.
Again, the first rule is to do no harm. Avoid using adhesives on surfaces that are hard to repair. Don’t tape to wallpaper, faux finishes, cabinets, or hardwood floors. Tape to shoe molding or painted baseboard rather than to hardwood floors. Tape to trim or painted ceilings rather than to faux-finished walls or wallpaper.
To remove tape, pull slowly and at an angle, parallel to the surface (instead of pulling straight out away from the surface). Use a hair dryer (not a heat gun) to warm up the adhesive.
Hardwood floors. For hardwood floor protection, our standard is two layers: one soft layer sealed against dust, and a second, strong layer for impact protection and easy cleaning. For newly-finished hardwood, a typical base layer is unfaced tacky felt; for most floors, we use tacky felt with a plastic facer.
An example of unfaced tacky felt is Surface Pro from KS International (dropcloth.com). It is not liquid-proof and allows the floor beneath to cure. It should not be covered with airtight materials during the curing phase. An example of tacky felt with a plastic facer is Econo Runner from Protective Products (protectiveproducts.com). It has a plastic top surface that blocks liquids.
Other base layers are less protective, more expensive, or more slippery. Paper layers are not protective enough, even when fully taped. Engineered floor underlayment (felt with a plastic top), found at home centers, is protective but slippery and expensive; we use this only if we don’t have time to get tacky felt with a plastic facer.
Taped sheet goods provide physical protection. Hardboard, 1/8‑inch structural board such as ThermoPly, or cardboard such as Ram Board or Flexboard (from Protective Products) are good options.
Hardboard is the most durable and easy to clean of these choices; the painted version is less slippery. Eighth-inch structural board is easy to fold for stairs, jambs, and the like. Cardboard is less expensive and easy to install, but it is not nearly as protective and is hard to clean. Only cardboard should be used on newly finished floors, because it allows curing to take place.
Carpets. For protecting carpets, we use Carpet Protection adhesive roll plastic, supplied by Protective Products; other products we’ve used have left residue on the carpet, so be careful to use a proven product. In any case, the plastic must be removed and replaced, or it can become very sticky and hard to remove. It has a limited life in service—usually less than two weeks.
Tacky felt products work well, even on carpet. Plastic sheeting (2‑mil or thicker) can be used to cover an entire room. Canvas tarps are acceptable for short-term use, but they can be a trip hazard, so exercise caution.
Tile. For protecting tile, we use adhesive or other roll material. Blue “Floor Protection” adhesive plastic works well to stop spills and dirt but offers no physical protection against bumps. Add a hard layer for impact protection.
Stair protection. For carpeted stairs, drop cloths are a trip hazard and shouldn’t be used. Carpet Protection adhesive plastic works well. A 24-inch strip is usually easier to install than a complete 36‑inch cover. Use the special “stair” roll with reverse adhesive winding. Tacky felt products also work well. Use wood strips nailed to the risers with 18-gauge nails to hold roll materials.
To protect hardwood stair treads, hardboard or plywood tread covers can be tacked with 18-gauge or smaller nails; holes are usually not visible later. Tread covers can be built with a cleat at the back and attached to risers, or with cleats at the sides attached to skirts, if holes in treads are unacceptable. Use tacky felt below for dust protection.
Tacky felt products without a hard cover are a good medium-term option; use strips tacked with 18-gauge nails to hold the roll material in place. Other roll protection is fine if you can tape it to the skirtboards or risers.
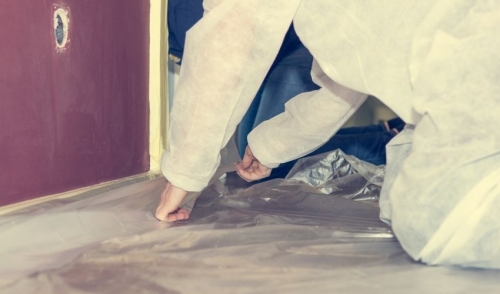
You can add a plastic layer on top of or under sheet goods. Plastic doesn’t prevent physical damage, but it does control dust and liquids.
Sill sealer or other flexible foam is good for wrapping railings and fixtures. Tacky felt is also good and can be cut on the roll with a miter saw into narrower widths. Cardboard and old carpet being demoed out (fuzzy side to the railing) are less expensive options that also protect well.
For covering walls, foam board, roll foam sheet, cardboard, fanfold, or corrugated plastic sheet are good. Even 6-mil plastic is fairly protective